
I’m a DIY’er through and through and looking at the cost a printer charges to edge paint business cards (around $200 a set) is too much for me when my cards only cost $75. I did a lot of research on edge painting – learning about the padding press a print shop uses, the process itself, ink types, etc. but luckily the mad talented Alyssa Hoffman of Frou Studio felt the same way and has a diy tutorial on edge painted business cards. (Thank you, thank you, thank you Alyssa!)
Here’s the Process I used
First
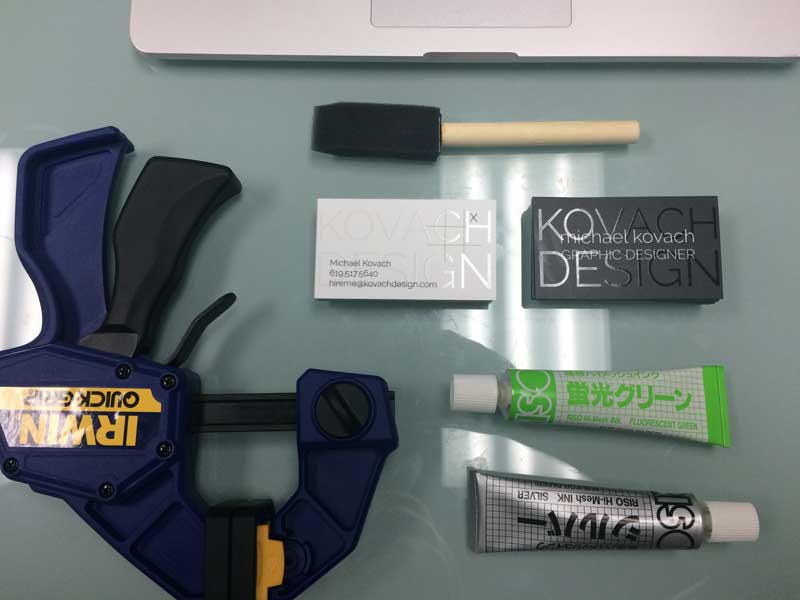
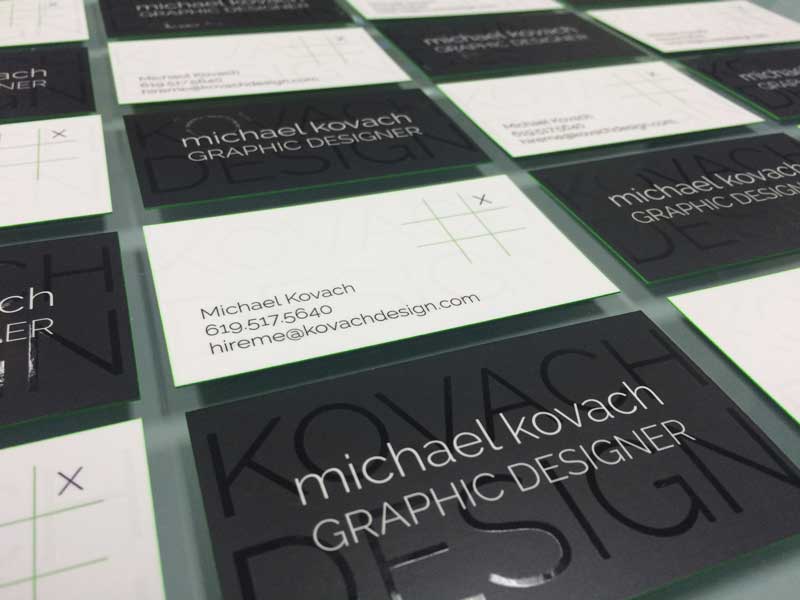
I designed my business cards. I originally wanted black paper stock business cards, but they were expensive so I got creative and decided on UV spot coating both sides. It took me a bit of sleuthing to find a company that did this, but I found the amazing Primo Cards. I researched a lot of companies and if you’re looking for letterpress bussiness cards Cotton Paperie is hands down the best I found. If you just need basic 16pt business cards Got Print is still my go to. I placed my order with Primo Cards – 16pt silk laminated cards with UV spot on both sides – 500 cards for $75, but they also have a 10% off Facebook coupon 🙂
Second
I ordered the same ink that Alyssa recommend, Riso Print Gocco Ink from printaddictjapan on Etsy. I got fluorescent green and metallic silver to go with my card’s design and to have different variations to hand out. It showed up from Japan to California in 7 days.
Third
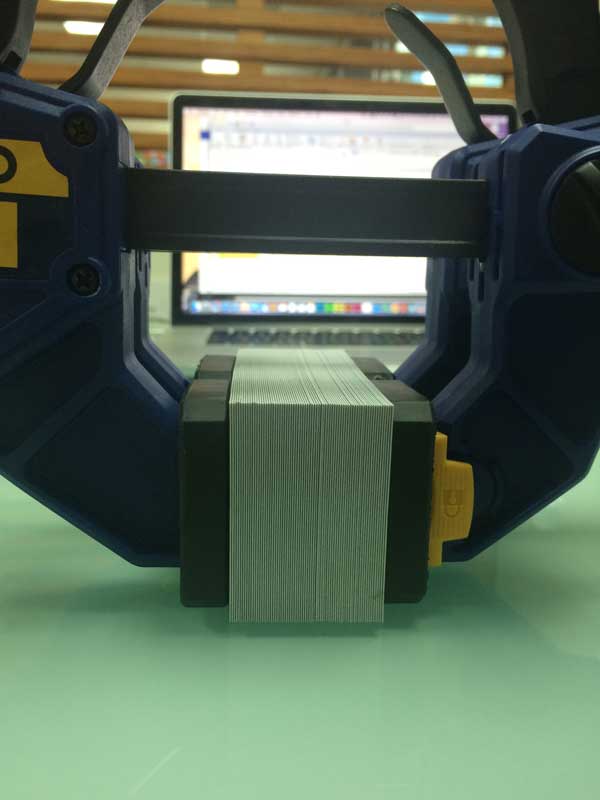
I went to Home Depot and bought two Irwin 6″ medium quick grip clamps. Pictured here. They happened to be on sale at Home Depot for $11 each. $22 seemed like a lot, but I wanted to really clamp down both ends of the cards for stability and the larger size had a bigger swivel jaw to do this. I was going to make this worth my while.
Fourth
I was ready to get this project started. I already had sponge brushes in my craft supply, but if you don’t purchase a few narrow ones. I began the same way Alyssa did, stacking the cards as flush as possible. I put both clamps on the cards, with each one facing opposite ways for balance. I looked around and found my iPhone next to me and used it on the edges of the cards to really make sure each edge was flush. It didn’t have a case on it, so the glass front was perfect to press against. I slowly started clamping tighter and tighter on each clamp until they were perfectly balanced and as flush as they were gonna get.
Fifth
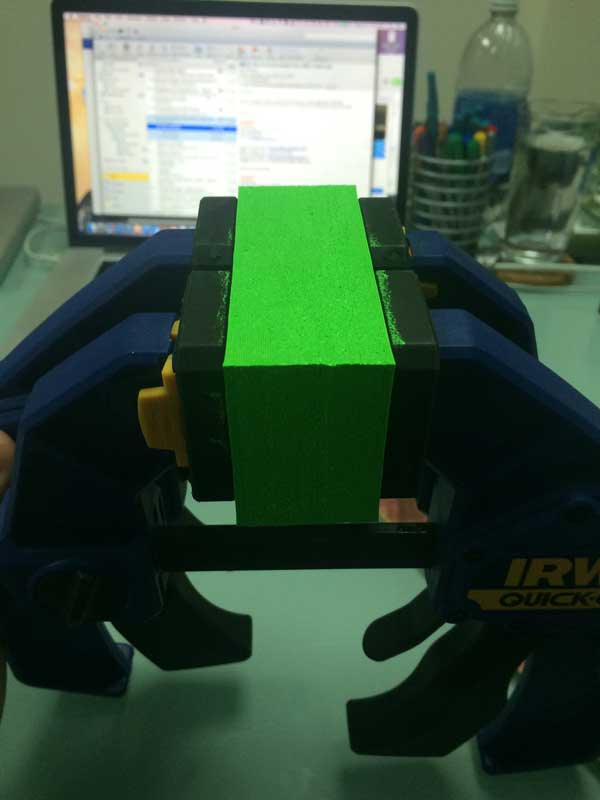
I was ink ready. I put a daub of ink on some cardboard and tapped the excess off. I then started on the short end of the card, and daubed the ink on. I didn’t use any brush strokes at all, I only daubed in hope it wouldn’t bleed. I worked my way around the cards until they were all painted. I checked for white spots, didn’t see any and set it aside to dry. I didn’t put the ink on thick, but it definitely was liberally.

Sixth
I waited about 45 minutes and kept checking for it to be non-tacky to the touch. The thicket parts were still a little wet, so I just daubed the ink around on white spots I saw. After a good hour it was pretty dry, so I spread a bunch of white paper from my printer on my desk and spread them all out to dry. Good thing I did this, cause they were beginning to get a little tacky and stick together. After another good hour, the ink was completely soaked in and dry, and my amazing business cards were done.
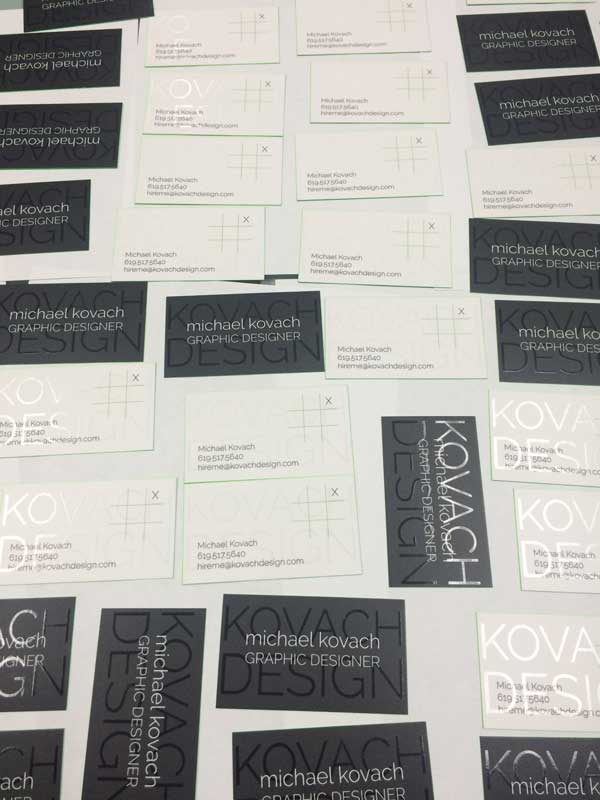
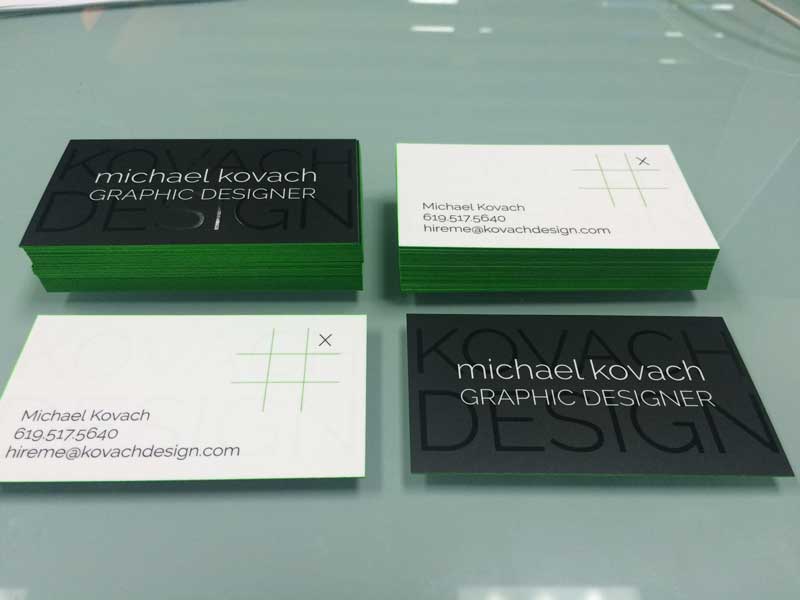
When I hand my cards out I say “Your move” and challenge my potential client to a mean game of tic-tac-toe. It breaks the ice, makes them remember me, and shows them my true out of the box creativity.
Now, what can I help you design!?
Alyssa Hoffman
July 3, 2014
These look AWESOME, Michael!!!! And the Spot UV detailing? SWOON! Love that my tutorial was so easy to follow. I love these! Thanks for sharing 🙂